Pothos Propagation in LECA: A Step-by-Step Guide
Pothos Propagation in LECA: A Step-by-Step Guide
Introduction
Pothos plants are beloved for their beautiful heart-shaped leaves and low maintenance requirements. If you’re looking to expand your collection or share the joy of these vibrant plants, propagation is the way to go. One effective method is propagation in LECA (Lightweight Expanded Clay Aggregate), which offers excellent drainage and aeration. In this guide, we will explore how to propagate Pothos in LECA, ensuring you achieve healthy roots and thriving plants.
Understanding LECA and Its Benefits
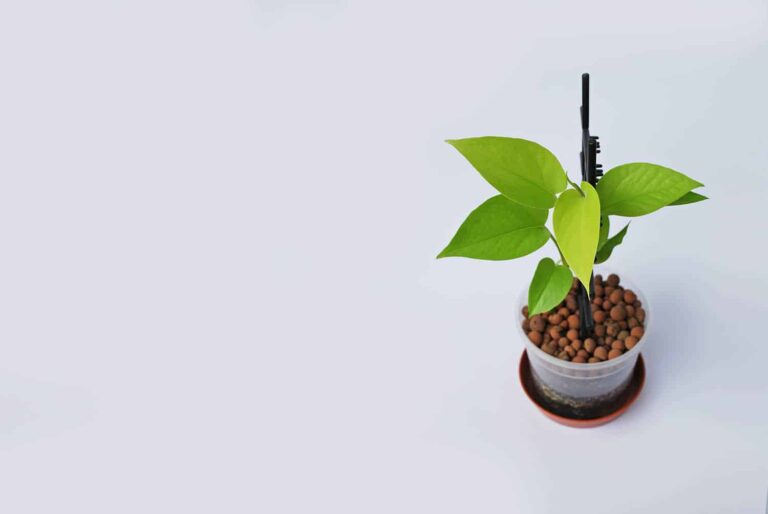
LECA is a growing medium made from clay pellets that are fired at high temperatures. This process creates lightweight, porous balls that provide excellent drainage and aeration for plant roots. Here are some benefits of using LECA for Pothos propagation:
– Aeration: Promotes healthy root growth by allowing air to reach the roots.
– Drainage: Prevents overwatering, minimizing the risk of root rot.
– Reusability: LECA can be cleaned and reused for future plantings.
Choosing the Right LECA
When selecting LECA for your Pothos propagation, consider the following:
– Size: Choose pellets that are around 1/4 to 1/2 inch in diameter. This size promotes optimal drainage and aeration.
– Quality: Ensure the LECA is free from dust and debris. Rinse the pellets before use to remove any particles that could affect water retention.
Step-by-Step Guide to Pothos Propagation in LECA
1. Gathering Materials
Before you begin, gather the following materials:
– Healthy Pothos cuttings
– LECA pellets
– A container (clear plastic or glass works well)
– Water
– Optional: Rooting hormone
2. Preparing Pothos Cuttings
To propagate your Pothos, follow these steps:
– Select Cuttings: Choose healthy stems with at least two leaves and a node (the bump on the stem where leaves grow).
– Cut: Use clean, sharp scissors to make a cut just below the node.
– Optional: Dip the cut end in rooting hormone to encourage faster root development.
3. Setting Up the LECA
Now that your cuttings are ready, it’s time to prepare the LECA:
– Rinse LECA: Wash the pellets thoroughly to remove dust.
– Layering: Place a layer of LECA at the bottom of your container.
– Insert Cuttings: Position the cuttings in the LECA, ensuring the nodes are buried while the leaves remain above the surface.
4. Adding Water
Fill the container with water, ensuring that the LECA is sufficiently moist but not submerged. The water level should reach just below the nodes to encourage root growth without risking rot.
5. Providing Optimal Conditions
For successful propagation, keep the following in mind:
– Light: Place the container in bright, indirect sunlight.
– Humidity: Maintain humidity by covering the container with a plastic bag or placing it in a humidity dome.
– Watering: Check the water level regularly, topping off as necessary to keep the LECA moist.
6. Monitoring Growth
After a few weeks, check for root development. You should see tiny roots emerging from the nodes. Once the roots are about 2-3 inches long, your Pothos cuttings are ready to be transferred to a larger container or pot.
Conclusion
Propagating Pothos in LECA is a simple and rewarding process that allows you to expand your indoor garden. With proper care, your cuttings will develop into beautiful, healthy plants. Now that you have this step-by-step guide, it’s time to get started on your own propagation journey. For more plant care tips and guides, consider subscribing to our newsletter or exploring our other articles on houseplant care.
Meta Description
Learn how to propagate Pothos in LECA with our step-by-step guide. Discover the benefits and tips for successful plant growth.
For more information on plant propagation techniques, visit the American Horticultural Society’s resource page on [](https://www.ahsgardening.org).


